
Introduction and Motivation
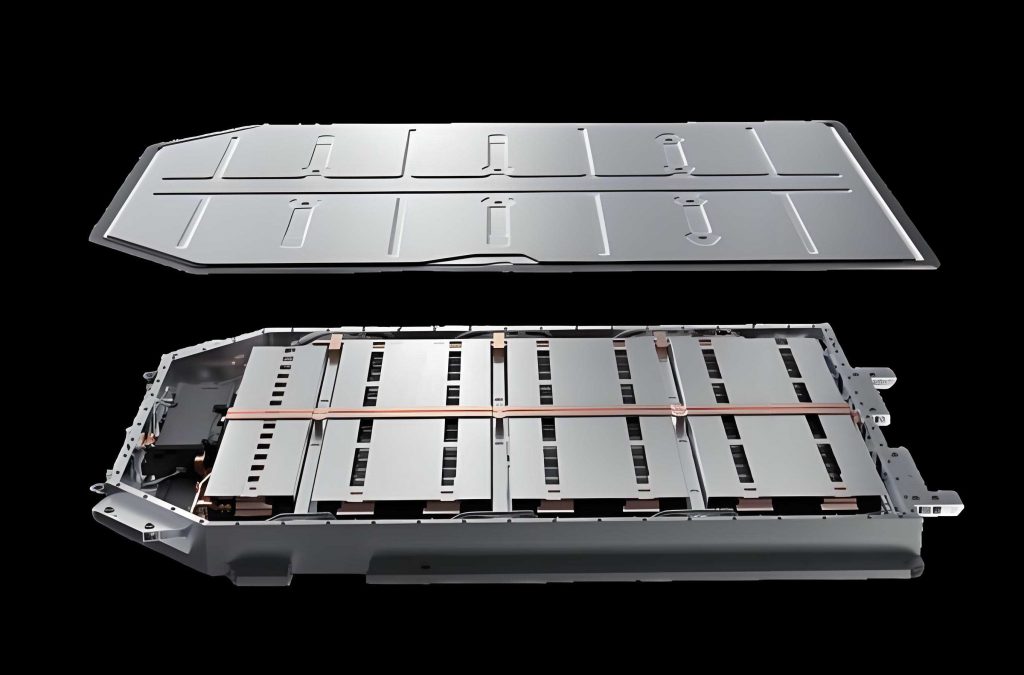
I developed this shock explosion protection system because the safety of an electric vehicle battery pack under mechanical impact remains one of the most difficult problems in electric vehicle testing. An electric vehicle battery pack is not a single homogeneous component. It is a complex assembly of cells, modules, busbars, cooling channels, structural frames, electrical management units, and thermal management components. When an electric vehicle battery pack is subjected to a dynamic side impact, the mechanical deformation can propagate through the pack structure and damage internal cells. This damage can initiate an internal short circuit, which may then develop into thermal runaway, smoke, fire, or even explosion within a very short time. Therefore, a test system that only applies the impact is not sufficient. The test system must also protect the laboratory, the operators, and the surrounding equipment after the impact.
I analyzed the existing test methods and found that most published studies focus on single cells, small modules, or simplified battery assemblies. Those studies are useful for understanding material behavior, but they do not fully represent the response of a complete electric vehicle battery pack. A complete electric vehicle battery pack has boundary conditions, mounting points, internal clearances, and structural interactions that cannot be reproduced by a single cell or a small module. Moreover, most existing test benches do not include a post-impact explosion protection function. After a dynamic impact test, the battery pack is often removed manually or left in place, which creates a severe safety hazard. I therefore concluded that a dedicated shock explosion protection system for a complete electric vehicle battery pack is necessary.
My design objective was to create a system that can perform a dynamic impact test on a complete electric vehicle battery pack and then immediately lower the battery pack into a water pool for cooling and explosion prevention. The system must be able to lock the test platform firmly against a fixed barrier during the impact, release the lock quickly after the impact, guide the platform without skewing, and control the descent speed so that the electric vehicle battery pack is submerged before thermal runaway becomes uncontrollable. I also required the system to be modular, maintainable, and safe for laboratory operation.
Functional Requirements and Test Conditions
I first performed a requirement analysis based on the test environment, the fixed barrier, the impact trolley, and the electric vehicle battery pack itself. The functional requirements can be divided into external requirements and internal requirements. External requirements come from the test standard, the laboratory layout, and the impact trolley. Internal requirements come from the need to lock, unlock, lift, lower, guide, and immerse the electric vehicle battery pack.
The test standard requires a sufficiently large and flat test area. The fixed barrier is made of reinforced concrete and must have a front width of no less than 3 m, a height of no less than 1.5 m, and a mass of no less than \(7 \times 10^4\) kg. The barrier surface must be vertical and covered with a 20 mm thick plywood layer. The impact trolley has a total mass of about 1500 kg and can be adjusted by adding or removing counterweights. The trolley can be equipped with a semi-cylindrical impactor of 254 mm diameter or a spherical impactor of 150 mm diameter. The traction acceleration must not exceed 0.3 g, and the speed control accuracy must be within ±0.2 km/h.
| Test Type | Description | Risk Level for Electric Vehicle Battery Pack |
|---|---|---|
| Slide simulated collision | Accelerates a sled to simulate a vehicle crash pulse | Moderate |
| Bottom impact | Applies a vertical or angled impact to the bottom of the pack | High |
| Bottom scratch | Scratches or scrapes the bottom surface of the pack | Moderate to high |
| Spiral roll | Rolls the pack to simulate a rollover event | High |
| Dynamic impact | Uses a trolley to directly impact the side of a complete electric vehicle battery pack | Very high |
Among these tests, the dynamic impact test causes the largest mechanical damage to the electric vehicle battery pack. In this test, the impact trolley directly strikes the side of the complete pack. The structural response of the electric vehicle battery pack directly determines the safety performance of the vehicle in a real collision. After the impact, the internal modules of the electric vehicle battery pack can enter thermal runaway within a short time. Smoke, fire, and explosion can occur. This is extremely dangerous for laboratory personnel. Therefore, the shock explosion protection system must be able to move the electric vehicle battery pack away from the impact zone and immerse it in water as quickly as possible.
The internal functional requirements are as follows. The system must lock the movable platform tightly against the fixed barrier before the impact so that the platform does not move backward or vibrate. The system must unlock the platform rapidly after the impact so that the platform can descend freely. The system must guide the platform in both horizontal and pitch directions to prevent skewing and jamming. The system must lift and lower the platform with adjustable speed. The system must detect the platform position, the lock state, the air pressure, and the water level. The system must also provide manual release in case of electrical or pneumatic failure.
Overall System Architecture
I chose a modular architecture for both the mechanical system and the control system. The mechanical system consists of a movable platform, a locking and unlocking mechanism, a horizontal guide mechanism, a pitch guide mechanism, a hoist with pulleys, and a water pool. The control system consists of a programmable logic controller, a human-machine interface, sensors, encoders, a variable frequency drive, pneumatic valves, and relays. The control system is divided into four functional modules: locking control, unlocking control, lifting and lowering control, and sensor signal processing. This modular structure makes the system easier to test, maintain, and modify.
The movable platform is the main carrier for the electric vehicle battery pack. It is built from welded beams and has a bottom plate with large circular holes and threaded holes. The circular holes reduce water resistance during immersion and emergence. The threaded holes allow different fixture designs for different electric vehicle battery packs. The platform connects to the pitch guide mechanism through H-shaped steel channels. The H-shaped steel provides a strong and stable guide groove. The locking mechanism uses a wedge-block principle. A pneumatic cylinder drives a crank-slider mechanism, which pushes a locking wedge against a fixed wedge on the platform. This design increases the locking force and makes unlocking fast. The horizontal guide mechanism uses guide arms, rollers, buffer blocks, and adjusting blocks. The pitch guide mechanism uses eccentric bearings and rails. The eccentric bearings allow the platform to be pressed tightly against the fixed barrier when locked and to have a small clearance when unlocked. The hoist uses a three-phase asynchronous motor, a reducer, a brake, and a wire rope. Four wire rope branches share the load, and two pulleys reduce friction.
The overall layout places the electric vehicle battery pack on the platform in front of the fixed barrier. The locking mechanism is mounted on the fixed barrier and engages the platform. The guide mechanisms are mounted on the fixed barrier and the platform. The hoist is mounted above the platform. The water pool is located below the platform. When the electric vehicle battery pack is impacted, the platform remains locked. After the impact, the operator presses the emergency release button. The locking mechanism unlocks, and the platform descends into the water pool. The electric vehicle battery pack is submerged and cooled. After the reaction is complete, the platform is lifted back to the parking position.
Mechanical Calculations and Component Selection
I performed detailed mechanical calculations to ensure that the locking mechanism, pneumatic cylinders, hoist motor, and wire ropes are correctly sized for the electric vehicle battery pack and platform. The total mass of the platform is 2000 kg. The maximum mass of the electric vehicle battery pack and fixtures is 800 kg. Therefore, the total gravitational load is:
$$ G = (M + m)g $$
where \(M\) is the platform mass, \(m\) is the electric vehicle battery pack and fixture mass, and \(g\) is the gravitational acceleration. Substituting the values gives:
$$ G = (2000 + 800) \times 9.8 = 27440 \text{ N} $$
Because the guide rails and guide grooves have a small clearance, the platform tends to tilt slightly forward when it is raised or lowered. The tilt angle is approximately 1 degree. The locking mechanism must overcome the forward component of the gravitational load. The required locking force is:
$$ F = \frac{(M + m)g \sin\theta}{\cos\theta} $$
With \(\theta = 1^\circ\), \(M = 2000\) kg, \(m = 800\) kg, and \(g = 9.8 \text{ m/s}^2\), the locking force is:
$$ F = \frac{(2000 + 800) \times 9.8 \times \sin 1^\circ}{\cos 1^\circ} \approx 478.97 \text{ N} $$
The locking mechanism uses a crank-slider mechanism. The relationship between the force delivered by the crank and the output force of the slider is:
$$ F_c = \frac{F}{\cos\varphi} $$
At the dead center position, the angle \(\varphi\) approaches zero, and the cylinder thrust equals the load force:
$$ F_r = F $$
The pneumatic cylinder must provide this thrust with a safety margin. The theoretical thrust of a pneumatic cylinder is:
$$ F_0 = \frac{\pi}{4} D^2 p \eta $$
where \(D\) is the cylinder bore, \(p\) is the working pressure, and \(\eta\) is the mechanical efficiency. I selected a working pressure of 0.6 MPa and an efficiency of 0.85. The required theoretical thrust is:
$$ F_0 = F \times \frac{k}{\beta} $$
where \(k\) is the safety factor and \(\beta\) is the load ratio. I chose \(k = 1.5\) and \(\beta = 0.8\). Thus:
$$ F_0 = 478.97 \times \frac{1.5}{0.8} \approx 898.07 \text{ N} $$
The required cylinder bore is:
$$ D = \sqrt{\frac{4F_0}{\pi p \eta}} = \sqrt{\frac{4 \times 898.07}{\pi \times 0.6 \times 10^6 \times 0.85}} \approx 47.35 \text{ mm} $$
I selected a standard bore of 50 mm. The maximum theoretical thrust of the selected cylinder is:
$$ F_0 = \frac{\pi}{4} \times 50^2 \times 0.6 \times 0.85 \approx 1001.38 \text{ N} $$
This is greater than the required locking force of 478.97 N, so the cylinder is adequate.
For the hoist motor, the required power is:
$$ P = \frac{P_w}{1000 \eta_w} $$
where \(P_w\) is the useful power and \(\eta_w\) is the total efficiency. The useful power is:
$$ P_w = F_1 v $$
where \(F_1\) is the load weight and \(v\) is the lifting speed. I selected a lifting speed of 0.125 m/s and an efficiency of 0.83. The required motor power is:
$$ P = \frac{2800 \times 9.8 \times 0.125}{1000 \times 0.83} \approx 4.14 \text{ kW} $$
I selected a 4.5 kW three-phase asynchronous motor with a conical rotor and a built-in brake. The motor parameters are listed in the following table.
| Parameter | Value |
|---|---|
| Model | ZDY131-4 |
| Power | 4.5 kW |
| Frequency | 50 Hz |
| Voltage | 380 V |
| Current | 11 A |
| Torque | 2.7 N·m |
| Speed | 1380 r/min |
For the wire rope, I selected a 6×36WS+IWR type. The minimum diameter is determined by:
$$ d = C \sqrt{F_e} $$
where \(F_e\) is the maximum rope tension and \(C\) is the selection coefficient. The coefficient is calculated from:
$$ C = \sqrt{\frac{n}{k w \sigma_1}} $$
where \(n\) is the safety factor, \(k\) is the rope twisting reduction factor, \(w\) is the rope fill factor, and \(\sigma_1\) is the nominal tensile strength. Using \(n = 4\), \(k = 0.82\), \(w = 0.46\), and \(\sigma_1 = 1770 \text{ MPa}\), I obtained \(C \approx 0.087\). The maximum rope tension is:
$$ F_e = \frac{Q}{m \eta_m} $$
where \(Q\) is the total load, \(m\) is the number of rope branches, and \(\eta_m\) is the pulley efficiency. With \(Q = 27440 \text{ N}\), \(m = 4\), and \(\eta_m = 0.96\), the maximum tension is:
$$ F_e = \frac{27440}{4 \times 0.96} \approx 7146 \text{ N} $$
The minimum rope diameter is:
$$ d = 0.087 \times \sqrt{7146} \approx 7.36 \text{ mm} $$
I selected a rope diameter of 10 mm for additional safety and durability.
Motion Control and Speed Planning
The platform must move smoothly during lifting and lowering. Sudden acceleration changes can cause vibration, rope slack, and impact loads. I therefore evaluated three speed profiles: trapezoidal, S-shaped, and sinusoidal. Each profile has advantages and disadvantages. The trapezoidal profile is simple and time-optimal, but it has acceleration discontinuities. The S-shaped profile has continuous acceleration, but it is slower in the acceleration and deceleration phases. The sinusoidal profile provides smooth acceleration and velocity with continuous derivatives, which is well suited to the electric vehicle battery pack immersion process.
For the trapezoidal profile, the acceleration is:
$$ a(t) = \begin{cases} a_m, & 0 \le t < T_1 \\ 0, & T_1 \le t < T_1 + T_2 \\ -a_m, & T_1 + T_2 \le t \le 2T_1 + T_2 \end{cases} $$
The velocity is:
$$ V(t) = \begin{cases} a_m t, & 0 \le t < T_1 \\ a_m T_1, & T_1 \le t < T_1 + T_2 \\ a_m T_1 – a_m(t – T_1 – T_2), & T_1 + T_2 \le t \le 2T_1 + T_2 \end{cases} $$
The displacement is:
$$ S(t) = \begin{cases} \frac{1}{2} a_m t^2, & 0 \le t < T_1 \\ a_m T_1 t – \frac{1}{2} a_m T_1^2, & T_1 \le t < T_1 + T_2 \\ a_m T_1 t – \frac{1}{2} a_m T_1^2 – \frac{1}{2} a_m (t – T_1 – T_2)^2, & T_1 + T_2 \le t \le 2T_1 + T_2 \end{cases} $$
For the S-shaped profile, the acceleration is:
$$ a(t) = \begin{cases} kt, & 0 \le t < T_1 \\ kT_1, & T_1 \le t < T_1 + T_2 \\ kT_1 – k(t – T_1 – T_2), & T_1 + T_2 \le t < 2T_1 + T_2 \\ 0, & 2T_1 + T_2 \le t < 2T_1 + T_2 + T_3 \\ -k(t – 2T_1 – T_2 – T_3), & 2T_1 + T_2 + T_3 \le t < 2T_1 + 2T_2 + T_3 \\ -kT_1, & 2T_1 + 2T_2 + T_3 \le t < 2T_1 + 2T_2 + T_3 + T_4 \\ -kT_1 + k(t – 2T_1 – 2T_2 – T_3 – T_4), & 2T_1 + 2T_2 + T_3 + T_4 \le t \le 2T_1 + 2T_2 + T_3 + 2T_4 \end{cases} $$
The corresponding velocity and displacement can be obtained by integration. The S-shaped profile avoids acceleration jumps, but the total motion time is longer.
For the sinusoidal profile, the acceleration is:
$$ a(t) = \begin{cases} a_m \sin(\omega t), & 0 < t \le t_a \\ 0, & t_a < t \le t_c \\ -a_m \sin(\omega(t – t_c)), & t_c < t \le t_e \end{cases} $$
The velocity is:
$$ v(t) = \begin{cases} \frac{a_m}{\omega}(1 – \cos(\omega t)), & 0 < t \le t_a \\ v_m, & t_a < t \le t_c \\ \frac{a_m}{\omega}(1 – \cos(\omega(t – t_c))), & t_c < t \le t_e \end{cases} $$
The displacement is:
$$ s(t) = \begin{cases} \frac{a_m}{\omega}t – \frac{a_m}{\omega^2}\sin(\omega t), & 0 < t \le t_a \\ s_a + v_m(t – t_a), & t_a < t \le t_c \\ s_c + v_m(t – t_c) + \frac{a_m}{\omega^2}(1 – \cos(\omega(t – t_c))), & t_c < t \le t_e \end{cases} $$
I selected the sinusoidal profile for the final control strategy because it provides the smoothest motion and reduces the risk of vibration that could damage the electric vehicle battery pack during descent. The variable frequency drive allows the speed to be adjusted by changing the output frequency. The encoder provides real-time position feedback, and the controller compares the actual position with the target position to adjust the speed.
Hardware Design and Component Selection
I designed the hardware system around a Siemens S7-1200 PLC, a Siemens ET200SP distributed I/O system, a Weinview touch screen, an Omron encoder, Omron proximity sensors, and a Delta MS300 variable frequency drive. The hardware configuration is divided into service devices, control devices, and field devices. Service devices include the computer and the touch screen. Control devices include the CPU module, digital input modules, digital output modules, communication modules, and the distributed I/O interface. Field devices include sensors, cylinders, solenoid valves, the hoist, the variable frequency drive, and relays.
For the touch screen, I selected a 10.1-inch resistive touch screen with a resolution of 1024×600, an IP65 protection rating, an Ethernet port, an RS232 port, an RS485 port, and a USB port. The touch screen is used to display the system status, modify parameters, and show the operating instructions. The selection criteria and the chosen model are summarized in the following table.
| Requirement | Selected Touch Screen |
|---|---|
| Resistive type for glove operation | 4-wire resistive |
| Screen size about 220 mm × 120 mm | 10.1 inch, 1024×600 |
| Dust and water protection | IP65 |
| Ethernet, RS232/485, USB | Yes |
| Programming software | EasyBuilder Pro |
For the encoder, I selected an Omron E6B2-CWZ6C incremental encoder with NPN output. It is a draw-wire displacement encoder that converts the platform position into pulse signals. The encoder has three channels: A, B, and Z. The A and B channels provide quadrature signals for direction detection, and the Z channel provides a zero reference pulse. The encoder is connected to the high-speed counter input of the PLC.
For the proximity sensors, I selected Omron E2E-X14MD2-Z sensors. They are used to detect the limit positions of the platform, the lock state of the locking mechanisms, the state of the safety pins, and the position of the electric vehicle battery pack. The sensors are installed at the moving parts and the fixed reference points. They provide non-contact detection, which improves reliability and reduces wear.
For the variable frequency drive, I selected a Delta MS300 general-purpose drive. It uses an uncontrolled rectifier, a DC link capacitor, and a PWM inverter. The drive receives a speed command from the PLC through the communication module and adjusts the output frequency to control the hoist motor speed. The drive also provides fault signals to the PLC. The main circuit and control circuit are separated to reduce electromagnetic interference.
The pneumatic circuit is designed for the locking and unlocking cylinders. The circuit includes an air source, a filter-regulator-lubricator unit, four three-position five-way solenoid valves, eight one-way throttle valves, four double-acting cylinders, and silencers. The working pressure is 0.6 MPa. The three-position five-way valve controls the direction of the cylinder. The one-way throttle valve controls the cylinder speed. The silencer reduces exhaust noise. The pneumatic components are listed in the following table.
| Component | Model | Quantity |
|---|---|---|
| Three-position five-way solenoid valve | RV5322E-08 | 4 |
| One-way throttle valve | SL10-04 | 8 |
| Cylinder | TCB 50×150 | 4 |
| Filter-regulator-lubricator | AEFR20004 + AEL20004 | 1 |
| Air tube | φ8 | As required |
| Two-way and three-way connectors | φ8 | As required |
The control signals are divided into digital inputs, digital outputs, and one analog output. The digital inputs include 15 proximity sensors, 3 encoder channels, 1 air pressure detection, 1 water level detection, 4 pushbuttons, and 10 remote control buttons. The total number of digital inputs is 34. The digital outputs include 8 solenoid valve signals, 2 system status indicators, 15 actuator status indicators, 4 operation panel indicators, and 1 variable frequency drive fault indicator. The total number of digital outputs is 30. The analog output is used to control the variable frequency drive speed. The input and output signal tables are shown below.
| Input Signal | Quantity |
|---|---|
| Proximity sensors | 15 |
| Encoder channels | 3 |
| Air pressure detection | 1 |
| Water level detection | 1 |
| Pushbuttons | 4 |
| Remote control buttons | 10 |
| Total digital inputs | 34 |
| Output Signal | Quantity |
|---|---|
| Solenoid valves | 8 |
| System status indicators | 2 |
| Actuator status indicators | 15 |
| Operation panel indicators | 4 |
| VFD fault indicator | 1 |
| Total digital outputs | 30 |
| Analog output | 1 |
The PLC modules are selected as follows. The main CPU is a Siemens CPU 1215C DC/DC/DC with 14 digital inputs, 10 digital outputs, 2 analog inputs, and 2 analog outputs. Two digital input modules of type DI 16×24VDC ST are used. One digital output module of type DQ 16×24VDC/0.5A ST is used. One combined digital input/output module of type SM1223 with 16 inputs and 16 outputs is used. One communication module of type CM1241 RS422/485 is used to communicate with the variable frequency drive. One ET200SP interface module is used as the distributed I/O interface. The module list is shown in the following table.
| Device | Model | Quantity | Order Number |
|---|---|---|---|
| CPU | CPU 1215C | 1 | 6ES7215-1AG40-0XB0 |
| Digital input module | DI 16×24VDC ST | 2 | 6ES7131-6BH01-0BA0 |
| Digital output module | DQ 16×24VDC/0.5A ST | 1 | 6ES7132-6BH01-0BA0 |
| Combined I/O module | SM1223 | 1 | 6ES7223-1BL32-0XB0 |
| Communication module | CM1241 | 1 | 6ES7241-1CH32-0XB0 |
| Distributed I/O interface | IM155-6PN ST | 1 | 6ES7155-6AA01-0BN0 |
The electrical schematic includes the power supply circuit, the I/O module circuits, and the hoist control circuit. The power supply uses a three-phase five-wire system. The three-phase lines and neutral line provide 380 V AC. The hoist motor is powered through the variable frequency drive. A single-phase line and neutral line provide 220 V AC, which is converted to 24 V DC by a switching power supply. The 24 V DC supplies the sensors, relays, solenoid valves, indicators, PLC, and remote control receiver. The I/O module circuits connect the pushbuttons, remote control buttons, sensors, and encoder to the PLC inputs. The PLC outputs connect to the solenoid valves, relays, indicators, and variable frequency drive. The hoist control circuit connects the variable frequency drive to the motor and includes overload protection and emergency stop.
Software Design
I developed the software in the TIA Portal environment with STEP 7. I created a new project, added the CPU and modules, configured the hardware, and set the IP addresses. The PLC, the distributed I/O, and the touch screen are connected through Ethernet. The PLC communicates with the variable frequency drive through the CM1241 module. The software is organized into organization blocks, function blocks, functions, and data blocks.
The main program is cyclic and runs in OB1. The startup program runs in OB100. The locking control is implemented in a function block. The unlocking control is implemented in another function block. The lifting and lowering control is implemented in a separate function block. The sensor signal processing is implemented in a function. Each function block has its own instance data block. This structure makes the program modular and easy to test.
The locking control program first checks whether the platform is in the test preparation position. It also checks that the platform is not moving and that the safety pins are in the correct state. If the conditions are met, the operator presses the lock button on the remote control or the operation panel. The PLC energizes the corresponding solenoid valve. The cylinder extends, and the locking wedge presses against the fixed wedge on the platform. The proximity sensor confirms that the locking mechanism is in the locked position. The status indicator turns green.
The unlocking control program checks that the platform is not moving and that the lock mechanism is engaged. When the operator presses the unlock button, the PLC energizes the solenoid valve in the opposite direction. The cylinder retracts, and the locking wedge moves away from the fixed wedge. The proximity sensor confirms the unlocked state. The status indicator turns red or off depending on the design.
The lifting and lowering control program first checks the safety conditions. The safety pins must be open. All locking mechanisms must be unlocked. The air pressure must be normal. The water level must be sufficient. If these conditions are satisfied, the operator can raise or lower the platform. The platform has four stopping positions: the highest limit, the parking position, the preparation position, and the pool bottom position. The encoder measures the platform position. The variable frequency drive controls the hoist motor speed. The PLC compares the current position with the target position and adjusts the speed command. When the platform reaches a stopping position, the PLC stops the hoist.
The sensor signal processing program monitors the air pressure, water level, safety pin state, and locking state. If any condition is abnormal, the corresponding indicator turns red, and the system prevents the start of the test. The program also monitors the encoder signal and the limit switches. If the platform moves beyond the safe range, the program stops the hoist and triggers an alarm.
I tested the program with the S7-PLCSIM simulation tool. I downloaded the program to the simulator, placed the CPU in run mode, and monitored the program online. I forced the inputs to simulate the sensor signals and observed the outputs. I verified the locking sequence, the unlocking sequence, the lifting sequence, the lowering sequence, and the emergency release sequence. I corrected several logic errors during simulation. For example, I found that the unlocking condition initially did not include the hoist stop state, which could have caused a conflict. I added the necessary interlock. I also found that the emergency release sequence needed a priority over the normal control sequence. I implemented this priority in the program.
I designed the human-machine interface on the touch screen. The main screen displays the test conditions, the test speed, and the platform position. The test conditions include air pressure, water level, safety pin state, and locking state. Each condition has an indicator. Green means the condition is satisfied. Red means the condition is not satisfied. The main screen also shows the current speed and the target speed. The parameter screen allows the operator to modify the speed parameters and the control parameters. The speed parameters include the lifting speed and the lowering speed in different position ranges. The control parameters include the encoder scaling factor and the lock/unlock delay time. The operation guide screen provides instructions for the operator, including the application area, safety precautions, main functions, and operating procedure.
Commissioning and Experimental Validation
After assembling the mechanical structure and the electrical control cabinet, I performed the commissioning in several stages. First, I checked the wiring, especially the main power supply, the controller power supply, and the leakage protection. I verified that the connections were correct before applying power. Second, I tested the communication between the PLC and the touch screen, the PLC and the solenoid valves, the PLC and the variable frequency drive, and the PLC and the encoder. I corrected the communication settings where necessary. Third, I downloaded the program to the PLC and checked the I/O points with the remote control. I compared the actual I/O points with the programmed addresses and adjusted the program until they matched. Fourth, I tested each actuator individually. I tested the locking mechanism, the unlocking mechanism, the lifting motion, the lowering motion, and the status indicators. I adjusted the pneumatic throttle valves to achieve smooth cylinder motion. I adjusted the variable frequency drive parameters to achieve smooth platform motion.
After the individual tests, I performed the system-level test. I lowered the speed to a safe level and kept personnel away from the moving parts. I simulated the complete test sequence: locking, system ready indication, unlocking, lowering to the pool bottom, and lifting back to the parking position. I observed the system for abnormal behavior. I found that the platform descended smoothly and that the locking mechanism released reliably. I also found that the encoder position feedback was accurate. I adjusted the speed profile to reduce vibration during the start and stop phases. I used the sinusoidal speed profile for the final configuration.
I then validated the system with a real dynamic impact test on an electric vehicle battery pack. The test used a semi-cylindrical impactor with a diameter of 254 mm. The impact trolley had a total mass of 1200 kg. The impact speed was 20 km/h. The impact was applied perpendicular to the side edge of the electric vehicle battery pack. A high-speed camera and a lighting system were used to record the impact. The acceleration sensor was mounted on the impactor. The acceleration data showed that the maximum impact acceleration was 36.783 g, and the duration to peak was 35.4 ms. After the impact, the electric vehicle battery pack showed smoke and a rapid temperature rise. The emergency release button was pressed. The locking mechanism unlocked, and the platform descended into the water pool. The electric vehicle battery pack was submerged and cooled. No fire or explosion occurred. The system operated reliably and safely.
| Test Parameter | Value |
|---|---|
| Impactor type | Semi-cylindrical, 254 mm diameter |
| Trolley mass | 1200 kg |
| Impact speed | 20 km/h |
| Maximum acceleration | 36.783 g |
| Time to peak | 35.4 ms |
| Post-impact action | Emergency release, water immersion |
| Result | Electric vehicle battery pack cooled, no fire or explosion |
During one test, the electric vehicle battery pack was larger and heavier than previous packs. The total mass of the pack and fixtures was significantly higher. When the emergency release button was pressed, the locking mechanism opened normally, but the platform descended only a short distance and then stopped. The remote control could still lower the platform. I investigated the problem and found that the variable frequency drive had entered overvoltage protection. The heavy load caused the hoist to exceed the maximum descent speed, and the regenerative power exceeded the drive capacity. I solved the problem by adjusting the variable frequency drive parameters and reducing the maximum descent speed during emergency release. This experience showed that the system must be tuned for different electric vehicle battery pack masses.
Conclusions and Future Improvements
I designed, implemented, and commissioned a shock explosion protection system for a complete electric vehicle battery pack. The system integrates mechanical design, pneumatic actuation, electrical control, and software programming. The locking mechanism uses a wedge-block principle and a crank-slider mechanism driven by a pneumatic cylinder. The guide mechanism uses horizontal guide rollers and pitch guide eccentric bearings. The hoist uses a three-phase asynchronous motor, a variable frequency drive, and four wire rope branches. The control system uses a Siemens PLC, a touch screen, an encoder, proximity sensors, and a variable frequency drive. The software is modular and includes locking, unlocking, lifting, lowering, and sensor signal processing. The human-machine interface provides status display, parameter setting, and operation guidance.
The system has been used in a testing center for dynamic impact tests on electric vehicle battery packs. The results show that the system can lock the platform firmly during impact, release the lock quickly after impact, lower the electric vehicle battery pack into the water pool smoothly, and prevent fire and explosion. The maximum impact acceleration in a representative test was 36.783 g, and the electric vehicle battery pack was successfully submerged after the impact. The system is reliable, easy to operate, and easy to maintain.
Several improvements can be made in future work. First, a universal fixture for different electric vehicle battery pack sizes and shapes would reduce setup time and improve reusability. Second, lightweight materials could be used for some structural components to reduce the total mass while maintaining strength. Third, the human-machine interface could be extended to allow direct control of the platform and the locking mechanism from the touch screen, in addition to remote control and operation panel control. Fourth, the control system could include adaptive speed control based on the actual electric vehicle battery pack mass and the descent distance. Fifth, additional sensors could be added to monitor the temperature and gas concentration of the electric vehicle battery pack during the test, so that the emergency release could be triggered automatically before visible smoke or fire appears.
In summary, the shock explosion protection system provides a practical solution for dynamic impact testing of a complete electric vehicle battery pack. It addresses both the mechanical impact requirement and the post-impact safety requirement. The system demonstrates the integration of mechanical, electrical, pneumatic, and software design. It can serve as a reference for similar test equipment and for the safety design of electric vehicle battery pack validation laboratories.